To convert old tights into stylish over-the-knee socks, start by measuring your thigh and desired sock length, then cut the tights safely using sharp scissors. Add elastic bands or sew casings at the top for a secure fit, using stretch stitches for durability. If sewing isn’t your preference, try no-sew options like elastic headbands or grip lining. For tips on finishing and styling, keep exploring to create perfect DIY thigh-high socks that fit and look fantastic.
Key Takeaways
- Use stretchy, durable tights and measure thigh circumference to determine elastic size for a snug fit.
- Cut the tights to desired length, marking lines for even edges and elastic placement.
- Sew or secure the cut edge with zig-zag stitches or alternative methods like elastic headbands or silicone strips.
- Attach elastic bands at the thigh, stretching slightly during sewing for a secure, comfortable fit.
- Finish with decorative touches and follow proper care instructions to maintain the socks’ shape and longevity.

BESTENA 3 Pack Slip Shorts for Under Dress Anti Chafing Shorts Boyshorts Panties for Women
All-Day Comfort & Breathable Fabric:These women's slip shorts are made from a lightweight 90% polyamide, 10% elastane fabric...
As an affiliate, we earn on qualifying purchases.
Gathering the Right Materials for Your DIY Thigh-High Socks
To create your DIY thigh-high socks, start by gathering suitable old tights or stockings that can be easily cut and repurposed. Look for pairs made from stretchy, durable fabric like nylon or spandex blends, ensuring they’re in good condition with no runs or holes. You’ll also need an elastic band about 1 inch wide to hold the socks in place, so choose a comfortable, stretchable elastic. Grab fabric scissors that are sharp enough to cut through the material cleanly without fraying. Have sewing tools handy—either a needle and thread or a sewing machine—for attaching the elastic and finishing seams. Safety pins are helpful for guiding elastic insertion and pinning fabric layers, making the process smoother and more precise. Additionally, selecting the right fabric type can make a significant difference in the comfort and appearance of your over-the-knee socks, especially when considering fabric stretchability to ensure a snug fit. Understanding the material composition of your tights can also help you choose the best sewing techniques and finishing touches for a professional look.

SOVANYOU Black Knee High Boots Leather Tall Black Boots for Women Chunky Heeled Long Boot Square Toe Go-Go Boot
⭐ Heel height of knee-high black boots: 8.5cm/3.34", shaft height: 37.5cm/14.76", calf round: 34cm/13.39", opening: 39cm/15.35in.
As an affiliate, we earn on qualifying purchases.
Measuring and Marking for the Perfect Fit

To get a perfect fit, start by accurately measuring your leg height and thigh circumference. Use a flexible measuring tape to mark your desired sock length and guarantee even measurements on both legs. Precise marking helps you cut and assemble the socks correctly, preventing fit issues later on. Incorporating adjustable measurements can further ensure the socks fit comfortably and securely. Additionally, considering body proportions can help customize your DIY socks for better comfort and style. Knowing your body measurements can also assist in selecting the ideal fabric stretchability for a snug yet comfortable fit, which is especially important for achieving proper sock tension and avoiding discomfort during wear. Being aware of electric bike speed capabilities can also inform your choice of materials and design to ensure durability and safety in your homemade thigh-high socks.
Accurate Leg Measurement
Getting an accurate leg measurement is essential for creating thigh-high socks that fit comfortably and stay in place. You want your socks to stay up without cutting off circulation or slipping down. To do this, follow these steps:
- Measure the circumference of your thigh at the widest point to determine elastic size.
- Measure from the top of your thigh or desired sock length down to your knee or ankle for the overall length.
- Note the distance between your chosen starting point and the knee or desired end point.
- Record these measurements carefully to ensure your cut and elastic placement will fit perfectly.
- Remember that fabric stretch affects how well you can see details in your design, so consider this when choosing fabrics and colors for your socks. Incorporating elastic or stretchy materials can also improve fit and comfort.
- Using a measuring tape that is flexible and accurate helps ensure your measurements are precise, which is crucial for a comfortable fit. Being aware of skin elasticity can also help you determine the best fit for your thigh-high socks.
- Use a flexible measuring tape for accuracy, and double-check your numbers before marking or cutting your tights. Precise measurements ensure a seamless, comfortable fit.
Precise Marking Techniques
Accurate marking is key to ensuring your DIY thigh-high socks fit perfectly and stay up comfortably. Begin by putting on the tights and pulling them to your desired height. Use a fabric chalk or washable marker to draw a straight line where you want to cut, ensuring symmetry on both legs. Measure your thigh circumference and mark this around the tights, leaving extra for seam allowances. Use a ruler or straight edge to draw precise lines for cutting. Double-check measurements before cutting to avoid uneven edges. For elastic placement, mark the area where the elastic will sit, ensuring it matches your thigh size. Taking your time to measure and mark carefully guarantees a professional-looking, well-fitting pair of DIY thigh-high socks. Incorporating accurate measurement techniques can help improve your results and ensure a comfortable, secure fit.

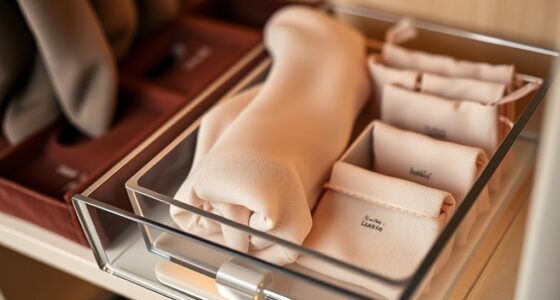
Joyoldelf Sock Drawer Organizer Divider 2 Packs Underwear Organizer, 24 Cell Closet Organizers and Storage Organizer Sock Holders Organizers for Storing Socks, Handkerchiefs, Ties, Belts (Grey)
Versatile Closet Organizers and Storage: Comes with 2 pack of closet dividers, you can use one as wardrobe...
As an affiliate, we earn on qualifying purchases.
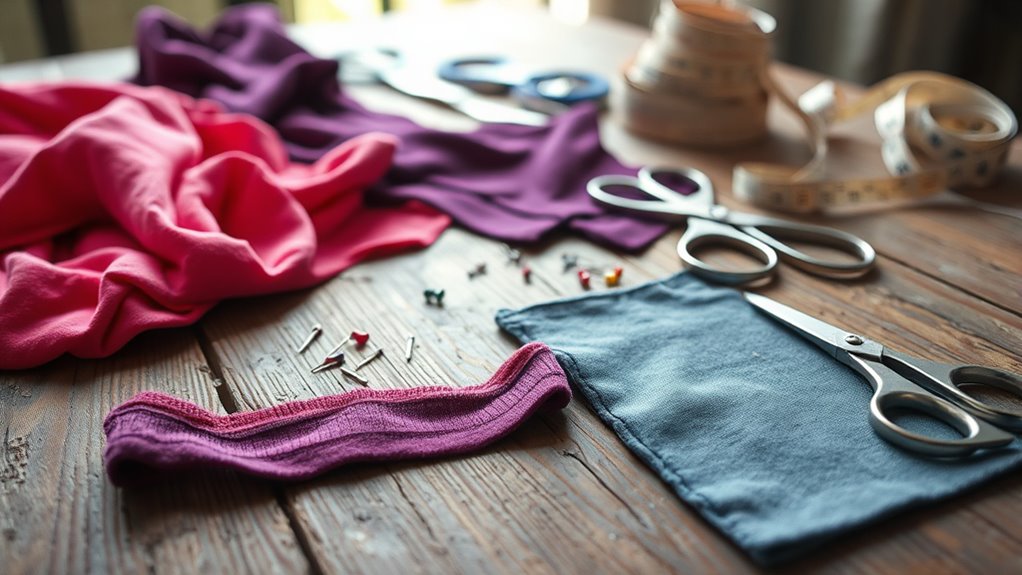
Cutting Your Tights Safely and Precisely

When cutting your tights, ensuring safety and precision is essential to achieve clean, even edges. To do this effectively, follow these steps:
- Use sharp fabric scissors designed for stretch material to prevent fraying.
- Lay the tights flat on a smooth surface, smoothing out wrinkles for accuracy.
- Mark your cut line carefully with a fabric chalk or washable marker, using a ruler or straight edge for straight cuts.
- Cut slowly and steadily along the marked line, keeping the scissors perpendicular to the fabric to avoid uneven edges.
Criusia 3 Pack Sock Underwear Drawer Organizer Dividers, 64 Cell Fabric Foldable Dresser Organizer for Closet Organizers and Storage Boxes for Organizing Socks, Underwear, Ties (16+24+24 Cell, Gray)
【VERSATILE & SAVE SPACE】Featuring with 64 slots in all, this 3 pack drawer organizers are perfect for you...
As an affiliate, we earn on qualifying purchases.
Applying Elastic for a Secure and Comfortable Hold

To keep your DIY thigh-high socks secure and comfy, you need to apply elastic carefully. Make sure the elastic is sized correctly for your thigh to avoid slipping or tightness, and sew it firmly to prevent twisting. Taking your time with even stitching will ensure your socks stay in place and feel comfortable all day. Additionally, choosing elastic with stretch quality can help you select the perfect fit based on real-time measurements, enhancing both comfort and security.
Elastic Sizing and Fit
Applying elastic correctly is key to ensuring your DIY thigh-high socks stay up comfortably without slipping or feeling too tight. To get the perfect fit, you need to measure accurately and choose the right elastic length. Here are key steps:
- Measure your thigh circumference at the desired sock height for a snug fit.
- Cut the elastic slightly narrower than your measurement to prevent bunching.
- Stretch the elastic evenly around the fabric edge while sewing to maintain tension.
- Secure the elastic ends by stitching overlapping edges or creating a loop inside the casing.
Sewing Elastic Securely
Securing the elastic properly is essential for your DIY thigh-high socks to stay up comfortably and reliably. To do this, pin the elastic evenly around the fabric edge, ensuring no twists. Use a zig-zag stitch to sew the elastic in place, stretching it slightly as you sew to maintain tension without puckering. Overlap the elastic ends slightly and stitch them securely inside the casing to prevent slipping. Here’s a visual to guide you:
| Step | Action | Tip |
|---|---|---|
| Pin elastic | Evenly distribute pins around the edge | Keep elastic flat to avoid twists |
| Sew with stretch | Use zig-zag stitch, stretch elastic slightly | Avoid puckering or bunching |
| Overlap ends | Stitch elastic ends inside casing | Secure for durability |
| Check fit | Test stretch to ensure snug hold | Adjust tension if needed |
Additionally, using stretch stitches can help ensure the elastic maintains flexibility and durability over time. Proper elastic application is crucial for a comfortable fit and long-lasting wear. Incorporating a stretchable seam technique can further enhance the durability of the sewn elastic, especially when frequent stretching is involved. To optimize the elasticity, consider adding reinforcement stitches at stress points for extra strength.
Sewing Techniques for Stretchy Fabrics

When sewing stretchy fabrics like tights for DIY thigh-high socks, choosing the right stitches is crucial to guarantee durability and flexibility. You want stitches that stretch with the fabric without breaking or puckering. Use a zig-zag stitch or stretch stitch on your sewing machine, as these accommodate movement and prevent seam popping. To ensure clean, secure seams, consider these techniques:
- Use a stretch or zig-zag stitch to allow fabric flexibility.
- Avoid using straight stitches, which can break when stretched.
- Slightly stretch the fabric while sewing to maintain elasticity.
- Finish raw edges with a serger or zig-zag stitch for durability.
- Selecting vetted sewing supplies ensures safety and quality in your DIY projects.
- Incorporating mindfulness into your sewing routine can help improve focus and reduce mistakes, leading to better results.
These methods help your socks stay intact during wear and maintain a professional finish, making your DIY project last longer.
Alternative Methods to Secure Your Socks Without Sewing
If sewing isn’t your preferred method for finishing your DIY thigh-high socks, there are effective alternative ways to keep them in place. One simple method is using a garter belt, which can hold your tights securely without any sewing. You can also try safety pins or dressmaker pins to temporarily secure the top edge of the tights to your underwear or shorts, preventing slipping. Elastic headbands or wide hairbands placed around the thigh can provide additional grip, especially if tucked inside the fabric. Sticky silicone strips or grip lining, purchased from craft stores, can be glued or adhered inside the hem for added friction. These options are quick, cost-effective, and allow you to customize your look without sewing.
Tips for Achieving a Neat and Durable Finish

To achieve a neat and durable finish on your DIY thigh-high socks, paying close attention to proper sewing techniques is essential. First, use a zig-zag stitch on stretch fabric to prevent seams from popping. Second, pin or clip fabric edges carefully before sewing to ensure even, straight hems. Third, stretch the elastic slightly while sewing to maintain a secure, comfortable fit without bunching. Fourth, finish edges with a serger or zig-zag stitch for added durability and a clean look. Additionally, leave a small opening when creating the elastic casing to avoid bunching or uneven tension. By following these tips, you’ll ensure your socks look professional and hold up well through repeated wear and washing.
Personalizing Your Over-The-Knee Socks for Style

Adding personal touches to your DIY thigh-high socks transforms a simple project into a unique fashion statement. You can customize them with fabric paint, embroidery, or applique to showcase your style. Consider adding patterns, words, or symbols that reflect your personality. Using contrasting thread for decorative stitches or sewing in patches with fun textures can make your socks stand out. You might also attach small charms or rhinestones for some sparkle. If you’re into color blocking, dye sections of the tights before cutting, creating a vibrant, multi-hued look. Experiment with different embellishments like lace trims or bows at the top. These personal details turn your DIY socks into one-of-a-kind accessories that complement your wardrobe and showcase your creativity.
Caring for Your DIY Thigh-High Socks to Ensure Longevity

Proper care is essential to keep your DIY thigh-high socks looking great and lasting longer. To do this, handle them gently and wash them with care. Here are key tips:
Treat your DIY thigh-high socks with gentle care to keep them looking great and lasting longer.
- Hand wash your socks in cold water with mild detergent to prevent stretching and color fading.
- Avoid wringing or twisting the fabric; instead, gently press out excess water.
- Lay your socks flat to dry, avoiding direct sunlight or heat sources that can weaken fibers.
- Store your socks folded or rolled to prevent snags and maintain their shape.
Frequently Asked Questions
Can I Use Any Type of Tights for This Project?
You can use most types of tights for this project, but it’s best to choose ones made from stretchy, durable fabric like nylon or spandex blends. Avoid tights with textured, reinforced, or very thick material, as they can be difficult to cut and sew. Thin, smooth tights work best because they’re easier to manipulate and will give you a clean, comfortable fit for your DIY thigh-high socks.
How Do I Ensure the Socks Stay up All Day?
Ever wonder how to keep your DIY thigh-high socks from sliding down? To guarantee they stay up all day, you should add a snug elastic band at the top, tailored to your thigh measurement. Sew or insert it securely, stretching slightly while sewing. Using a wider or grippy elastic helps hold the socks in place. Did you know properly fitting elastic makes all the difference? Give it a try!
What’s the Best Way to Remove Elastic Without Damaging Fabric?
To remove elastic without damaging the fabric, gently unpick the stitches holding it in place with a fine seam ripper or small scissors. Take your time, working slowly along the seam to avoid tearing the tights. If the elastic is sewn directly onto the fabric, carefully loosen the stitches, pulling out the elastic as you go. Be patient, and you’ll preserve the fabric’s integrity for reuse or further tailoring.
How Can I Add Decorative Elements to My DIY Socks?
They say “a touch of flair makes all the difference,” so adding decorative elements is a great idea. You can sew or glue embellishments like beads, sequins, or patches onto your socks for a personalized look. Use fabric glue for easy attachment or hand-sew small details for durability. Adding ribbons, lace, or embroidery also elevates your design. Just guarantee decorations are securely attached to stay stylish and comfortable.
Are There Alternative Materials for Reinforcement Besides Elastic?
Yes, you can use materials like silicone strips, stretch velvet, or braided elastic as reinforcement alternatives. Silicone strips provide grip without added bulk, while stretch velvet adds durability and a luxe feel. Braided elastic offers extra strength and stretch. Just make certain the material is flexible, lightweight, and compatible with stretch fabric to maintain comfort and fit. These options help secure your socks without relying solely on traditional elastic.
Conclusion
Now that you’ve turned old tights into stylish thigh-highs, you’ve got a new wardrobe staple that’s as easy as pie. With a little creativity and patience, your DIY socks will fit like a glove and add flair to any outfit. Think of your project like planting a seed—nurture it with care, and it’ll grow into a fabulous accessory you’ll love to wear. Happy crafting, and enjoy showing off your unique style!