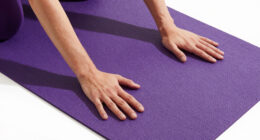
To DIY tie-dye and customize plain tights at home, start with 100% cotton tights for vibrant results, and prepare a clean, well-ventilated workspace. Choose your favorite dye techniques like spirals or crumples, then secure your fabric with rubber bands or ties before applying bold colors. Let the dye set overnight, rinse, and air dry for best vibrancy. Adding embellishments or decorating further elevates your design—continuing will reveal all the tips to create stunning, personalized tights.
Key Takeaways
- Use high-quality, natural cotton tights and pre-wash them for best dye absorption.
- Choose your preferred dyeing technique, like spiral or crumple, and secure fabric with rubber bands for patterns.
- Apply vibrant fabric dyes carefully, layer colors thoughtfully, and let them set for 6-8 hours or overnight.
- Rinse in cold water, air dry, and add embellishments like beads or patches for personalized touches.
- Follow proper washing and storage tips to maintain the vibrancy and longevity of your customized tights.

Rigel Leg Stretcher, 220LBS Leg Stretch Machine, Heavy Duty Steel Frame Equipment Splits Machine, Leg Stretching Training Machine for Home Gym Split Machine Training Fitness
【Exercise for Everyone】: Our leg stretcher machine can be used with confidence whether you are an adult or...
As an affiliate, we earn on qualifying purchases.
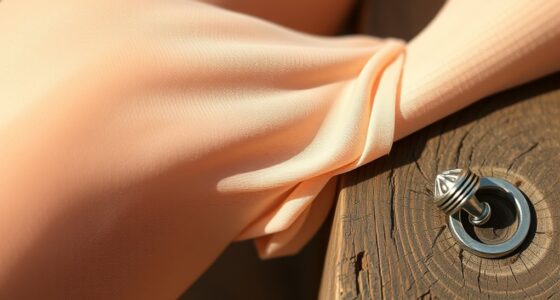
Selecting the Right Tights and Materials
Choosing the right tights and materials is essential for a successful tie-dye project. Start with plain, 100% cotton tights, as fabric dye adheres best to natural fibers. Synthetic fabrics won’t absorb dye well, leading to dull or uneven colors. When selecting tights, consider their thickness; thinner tights allow for easier dye penetration and more vibrant results. For fabric dye, opt for high-quality, vibrant options that are easy to work with. Remember, color mixing is key—use primary colors to create custom shades or blend different hues for unique effects. Test your dye on a small fabric swatch first to see how it reacts. The right tights and quality fabric dye set the foundation for stunning, vivid tie-dye patterns. Additionally, dye absorption can influence how vibrant and long-lasting your designs will be, so choosing the right fabric is crucial for achieving your desired results. Proper tip size selection in the dye application process can also impact the evenness and sharpness of your patterns. Incorporating knowledge of automation in business can help streamline your process if you decide to produce multiple items, ensuring consistent results across your projects.

Foam Roller Set - High Density Back Roller, Muscle Roller Stick,2 Foot Fasciitis Ball, Stretching Strap, Massager Ball for Whole Body Physical Therapy & Exercise, Yoga, Back Pain, Leg, Deep Tissue
" Whole Body Massage Foam Roller KIT " – You can get a high density 12" deep foam...
As an affiliate, we earn on qualifying purchases.
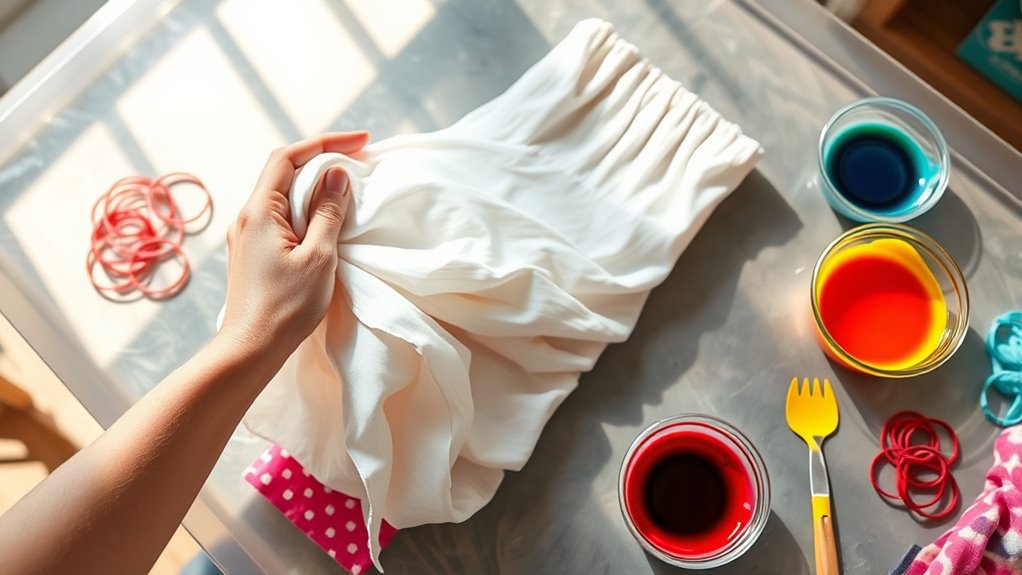
Preparing Your Workspace and Supplies
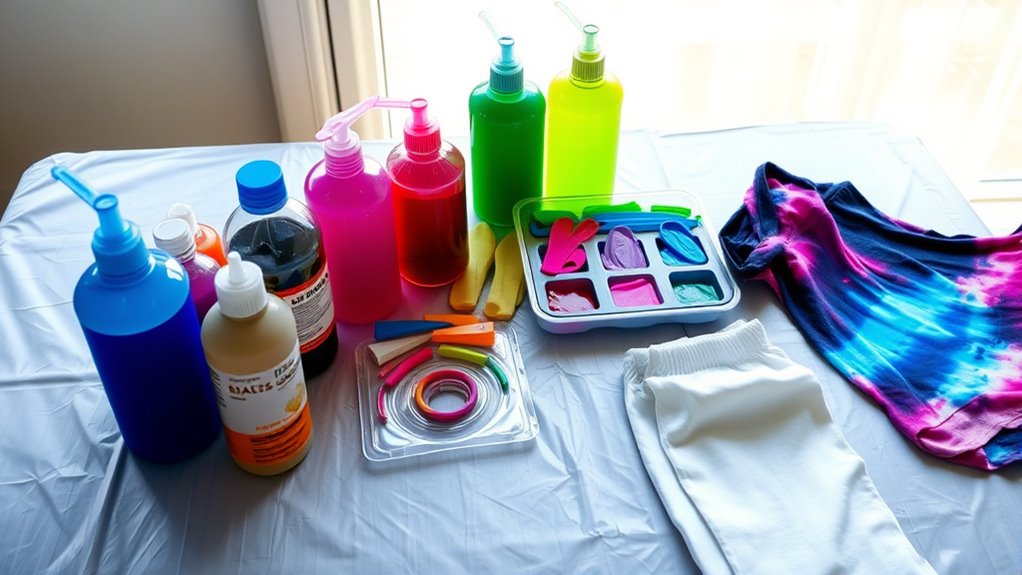
Before you start dyeing, it’s important to prepare your workspace to keep things clean and organized. Clear a flat surface and cover it with plastic or old newspapers to protect it from stains. Gather all your supplies—dye bottles, gloves, rubber bands, and towels—and keep them within easy reach. Proper workspace organization helps you work efficiently and prevents accidents. Remember safety precautions, like wearing gloves to avoid skin stains and working in a well-ventilated area to avoid inhaling fumes. Keep a water source nearby for rinsing and a trash bin for disposal. Taking these steps ensures a smooth dyeing process and keeps your home tidy. Additionally, understanding color accuracy in dyes can help you achieve more vibrant and consistent results. Being aware of dye color mixing techniques can also enhance your customization options and final appearance. With everything set, you’re ready to start creating your custom tie-dye tights.
TOLOCO Massage Gun, Deep Tissue Back Massage for Athletes for Pain Relief, Percussion Massager with 10 Massages Heads & Silent Brushless Motor, Valentines Day Gifts for Him Her, Black
Quick Pain Relief: The TOLOCO deep tissue massage gun has a high penetration force of 12mm, up to...
As an affiliate, we earn on qualifying purchases.
Choosing Your Tie-Dyeing Technique
When choosing your tie-dyeing technique, consider the patterns you want to create and how much control you need over the design. Preparing your fabric properly will help guarantee vibrant colors and clean results, no matter which method you pick. Experimenting with different techniques and tips for fabric prep can make your custom tights truly stand out. Additionally, practicing fabric dyeing skills and mindful decluttering strategies can help you stay organized and create a more enjoyable crafting environment. Incorporating tuning modifications such as aesthetic enhancements or custom details can also inspire creative ideas that personalize your project even further. Being aware of personal debt forgiveness bills and their potential benefits can also provide financial peace of mind, freeing you to focus more on your creative pursuits. Understanding color fixation techniques can ensure that your designs remain vibrant and long-lasting.
Techniques for Patterns
Selecting the right tie-dye technique is essential for creating the pattern you envision on your plain tights. Your choice affects color blending and the overall pattern symmetry. For bold, swirling designs, try the spiral method, which creates dynamic color transitions and symmetrical patterns. If you prefer more controlled designs, the crumple technique offers unpredictable color blending with interesting textures. For sharp, geometric shapes, use rubber bands to section off areas, maintaining pattern symmetry while controlling color placement. Twisting and tying your tights in specific ways allows you to experiment with different patterns and color effects. Remember, the way you fold, twist, or bind the fabric directly impacts the final appearance, so plan your technique carefully to achieve your desired look. Incorporating drivetrain components such as different folding methods can also influence how colors spread during the dyeing process. Additionally, experimenting with technique variations can help you discover unique patterns and effects that set your design apart. To enhance your results, consider experimenting with dye concentration to modify color intensity and create more vibrant or subdued effects.
Fabric Preparation Tips
Choosing the right fabric preparation method is essential to guarantee your tie-dye patterns turn out vibrant and well-defined. Start by fabric pre-washing your tights to remove any finishes or residues that could hinder dye absorption. Use cold water and a mild detergent, then let them dry completely. Ensuring proper fabric pre washing helps improve dye compatibility, allowing colors to spread evenly and stay vibrant. Check the dye instructions to confirm compatibility with the fabric type—some dyes work better on natural fibers like cotton, while others are suited for synthetic blends. Avoid using fabric softeners or conditioners before dyeing, as they can create a barrier that prevents dye from penetrating. Proper preparation sets the stage for successful, long-lasting tie-dye designs. Additionally, understanding the fabric type ensures you select the most suitable dye and technique for optimal results. Remember that certain water park attractions may influence fabric choice if you plan to wear your tie-dye during water-related activities, ensuring your design remains vibrant even in wet conditions. Using proper dyeing techniques can also significantly impact the intensity and durability of your final design. Moreover, using appropriate fixation methods can help set the dye and improve the longevity of your creation.

CINCOM Leg Massager with Heat and Compression, Legs Massage for Circulation and Pain Relief, Heating Calf Leg Air Compression Massager Help with Relief Edema
【Air Compression Leg Massager】Introducing our HEAT THERAPY LEG MASSAGER by CINCOM, a perfect solution for leg pain relief...
As an affiliate, we earn on qualifying purchases.
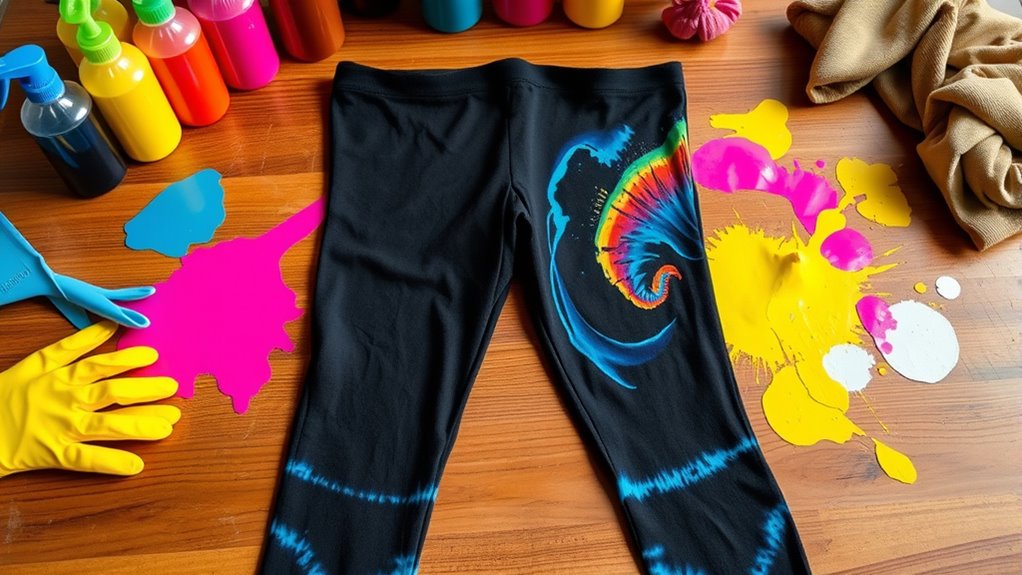
Creating Your Design and Applying the Dye
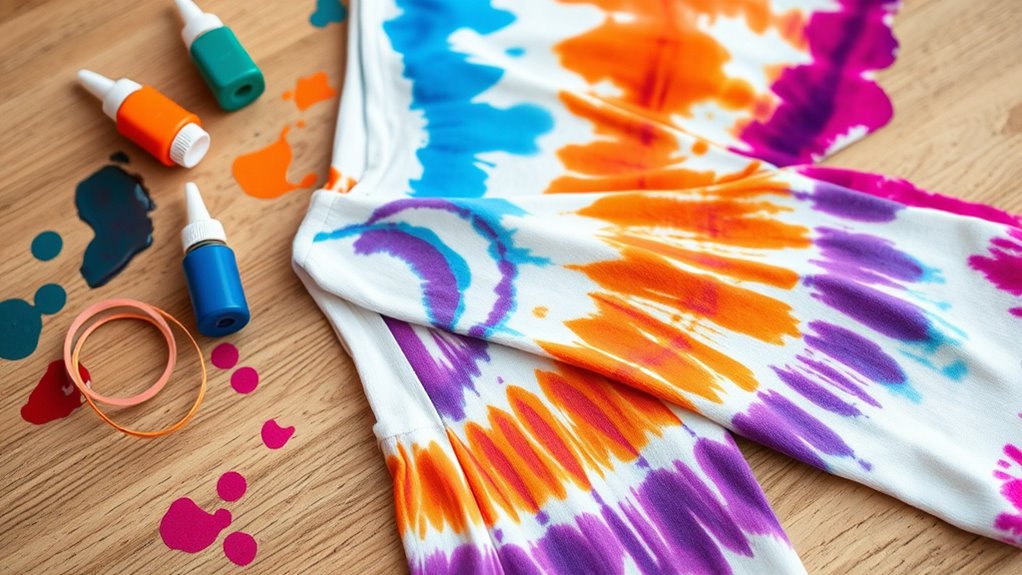
Once you’ve decided on your design idea, it’s time to start creating and applying the dye. Begin by sketching your pattern lightly with a fabric-safe pencil or chalk to guide your application. When applying the dye, focus on color blending to achieve smooth gradations between shades, which adds depth to your design. To guarantee vibrant, lasting colors, work quickly and evenly, maintaining dye stability by keeping your workspace at a consistent temperature and using the right amount of dye. Layer your colors carefully, allowing each to set slightly before adding new ones to prevent bleeding. Take your time with precise application, and avoid over-saturating areas to keep your design sharp. This process will help you create a unique, eye-catching tie-dye or custom pattern on your tights.
Setting and Fixing Your Colors

After applying your dye, it’s vital to set and fix the colors to guarantee they stay vibrant and won’t fade over time. Proper dye fixation helps prevent color bleeding when you wash your tights. To achieve this, wrap your dyed tights in plastic and let them sit for at least 6-8 hours or overnight. This step allows the dye to thoroughly bond with the fabric fibers. Rinsing your tights in cold water immediately after setting helps remove excess dye and reduces bleeding. Avoid using soap during this initial rinse, as it can interfere with dye fixation. Once the water runs clear, gently wash your tights with mild detergent and air dry. This process ensures your colors stay bright and vibrant, lasting through many wears. Monitoring air quality indicators can also help ensure your environment remains healthy during the dyeing process. Additionally, maintaining proper ventilation during and after dyeing can help disperse any fumes or particles, promoting a safer workspace.
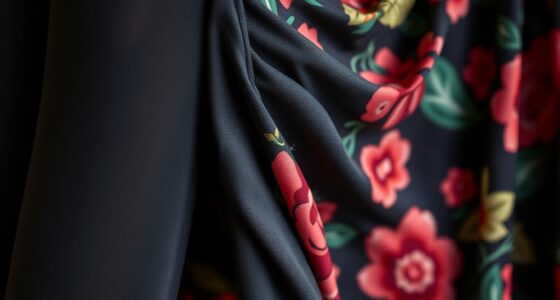
Customizing With Additional Accessories and Details

Adding accessories and details is a great way to personalize your tie-dye tights and make them stand out. You can use embellishment techniques like sewing on beads, patches, or appliqués to add texture and visual interest. Consider pairing your tights with statement jewelry, such as chunky rings or layered necklaces, to enhance your look. Experiment with different accessory pairing ideas—like adding lace trims, safety pins, or fabric paint accents—to create unique combinations. These small touches can transform plain or patterned tights into bold fashion statements. Keep your embellishments lightweight and secure to ensure comfort and durability. With a little creativity, accessories and details will make your DIY tights truly one-of-a-kind, reflecting your personal style perfectly.
Caring for Your Handcrafted Tights

Taking good care of your handcrafted tie-dye tights guarantees they stay vibrant and last longer. To preserve their color, wash them in cold water and avoid harsh detergents that can strip dye saturation. When handling your tights, be mindful of fabric stretch—overstretching can cause the fabric to lose its shape or damage the dye pattern. Turn them inside out before washing to protect the dye and reduce friction. Hang them to dry or lay flat to prevent fabric distortion. Avoid using a dryer, as heat can weaken the fibers and fade colors. Proper storage also helps maintain their quality; fold gently and keep away from direct sunlight. With proper care, your unique tights will stay vibrant, comfortable, and beautiful for many wears.
Tips for Perfecting Your DIY Tie-Dye Creations

To create eye-catching tie-dye designs, choose vibrant colors carefully to guarantee they stand out. Make sure to secure your fabric tightly with rubber bands or strings to form sharp, clear patterns. Paying attention to these details will help you achieve professional-looking, striking results.
Use Vibrant Colors Strategically
Vibrant colors can transform a simple tie-dye project into a stunning piece, but using them strategically is key to achieving the best results. Focus on color blending to create smooth gradations between shades, which adds depth and visual interest. Incorporate color blocking by choosing bold, contrasting hues in separate sections to produce eye-catching patterns. Plan your color placement carefully—placing intense colors next to lighter ones can prevent overpowering effects. Remember, layering vibrant dyes can intensify the look, but avoid over-saturating areas to maintain clarity. Experiment with different combinations to find what works best for your design. By thoughtfully applying vibrant colors through blending and blocking techniques, you’ll craft a dynamic, professional-looking tie-dye that stands out.
Securely Bind for Patterning
Securing your fabric properly is the key to achieving sharp, well-defined patterns in your tie-dye projects. To do this, you need to securely bind your fabric using tight knots, rubber bands, or string, depending on the pattern you want. Properly binding prevents colors from bleeding into unwanted areas, helping your patterning techniques stand out clearly. Be sure to stretch the fabric smoothly before binding to avoid gaps or slack. Wrap and secure each section firmly, ensuring no movement during dyeing. For intricate designs, use multiple bands or different binding techniques to create layers of pattern. The better you secure your fabric, the more precise your final design will be, giving you professional-looking, eye-catching results every time.
Frequently Asked Questions
Can I Use Fabric Paint Instead of Dye for Better Results?
When deciding between fabric paint vs dye, consider the results you want. Fabric paint offers more control, vibrant colors, and better paint durability, making it ideal for detailed designs. Dye can create a more blended, softer look but may fade faster. If you want long-lasting, vivid designs, fabric paint is the better choice, especially for customizing plain tights at home. Just make sure to follow instructions for *best* durability.
How Long Do Homemade Tie-Dye Tights Typically Last?
Your homemade tie-dye tights usually last several wears if you follow proper care. To maintain colorfastness and durability, wash them inside out in cold water, and avoid harsh detergents. For stain removal tips, act quickly with gentle spot cleaning. Keep in mind, DIY dyes may fade faster than store-bought ones, so handle them carefully to enjoy vibrant colors longer and extend the lifespan of your custom tights.
Are There Eco-Friendly Dyes Suitable for Tights?
You’ll be glad to know eco-friendly dyes are available for tights. Look for natural coloring options like plant-based dyes, which are safer for the environment and gentle on your skin. These eco-friendly dyes offer vibrant colors without harmful chemicals, making your DIY projects more sustainable. When choosing dyes, guarantee they’re specifically suitable for fabric to achieve lasting, beautiful results. Using natural coloring methods helps you create stylish tights while respecting the planet.
Can I Wash Tie-Dye Tights With Other Clothing?
Imagine your tie-dye tights as a delicate piece of artwork—you wouldn’t mix it with rough paintbrushes. To keep colors vibrant, you should wash tie-dye tights separately the first few times. Afterward, clothing compatibility improves, but always use cold water and gentle cycles. Washing tips like these prevent color bleeding and preserve your design. So, yes, you can wash them with other clothes eventually, but careful separation is key initially.
What Safety Precautions Should I Take During Dyeing?
When dyeing, you should wear protective gear like gloves and aprons to prevent staining your skin and clothes. Make sure your workspace is well-ventilated to avoid inhaling fumes from dyes and chemicals. Keep your work area organized and away from children or pets. Always follow dye manufacturer instructions, and wash your hands thoroughly afterward. These precautions keep you safe and guarantee a smooth, enjoyable dyeing process.
Conclusion
Now that you’ve mastered the art of DIY tie-dye and customizing plain tights, your creations are truly transformed into wearable masterpieces. With patience and a splash of creativity, your tights can outshine even the most vibrant rainbow—making you the trendsetter of your circle. Keep experimenting, caring, and perfecting your craft, because every stitch and splash brings you closer to fashion greatness. Get ready to turn everyday tights into show-stopping, one-of-a-kind works of art!