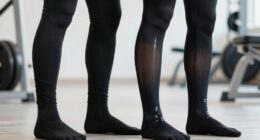

To extend the life of your favorite tights with a no-sew repair, assess the damage first—small tears can be fixed with fabric glue or double-sided tape, while larger holes may need iron-on patches. Gather household supplies like scissors, pins, and fabric glue, and carefully apply your chosen fix, making sure to press and secure the edges. Properly maintaining and storing your tights helps prevent future damage. If you keep exploring, you’ll discover even more effective tips to keep your tights looking great.
Key Takeaways
- Assess damage size and location to choose the best no-sew repair method, such as patches or dyeing.
- Use household items like fabric glue, double-sided tape, and scissors for quick, effective repairs without sewing.
- Apply patches carefully with heat or adhesive, ensuring proper pressing and drying for durability.
- Reinforce edges and seams to prevent fraying and extend repair longevity.
- Handle and store tights properly to avoid future tears and maximize the lifespan of your repaired tights.

FITTDYHE Fabric Glue Permanent, 60 ML Washable Clear Clothing Glue, Super Fabric Glue for Rhinestones, Patches, Clothes, Denim, Leather, Polyester, Fabrics, Doll Repair, Flannel, Cotton
Work With Fabric: Our fabric glue is suitable for all types of fabrics, including cotton, flannel, denim, leather,…
As an affiliate, we earn on qualifying purchases.
As an affiliate, we earn on qualifying purchases.
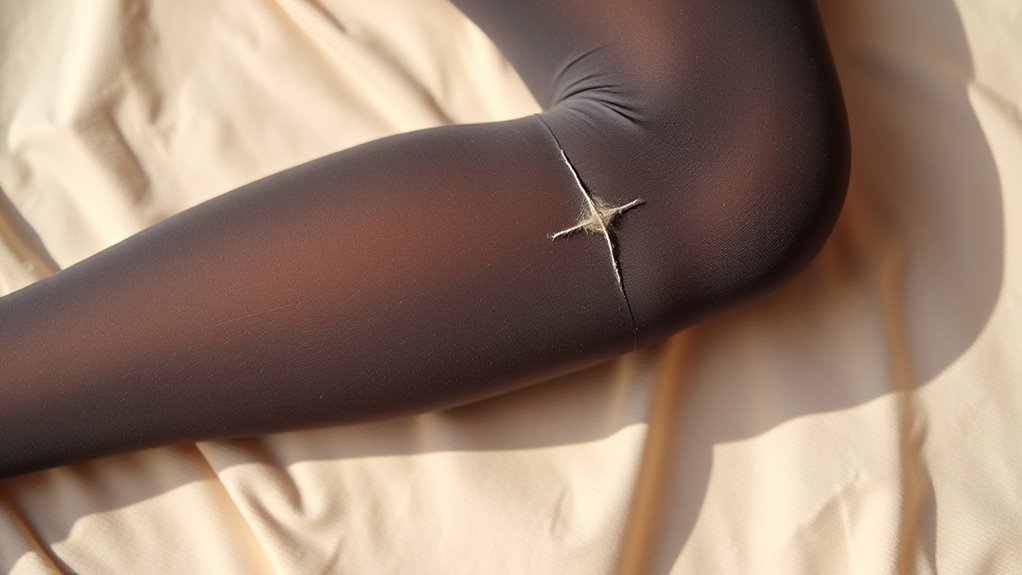
Assessing the Damage and Choosing the Right Repair Method

Before you begin your repair, it’s important to carefully assess the damage to determine the best approach. Check if the tear is small or large, and whether it’s located on a high-stress area. This helps you decide if a simple patch or a more detailed fix is needed. Consider your knitting techniques and dyeing methods to match the repair seamlessly. If the tights have intricate patterns or specific colors, you might need to adapt your repair method to preserve the design. For small holes, a straightforward no-sew patch using fabric glue or a heat-bonding adhesive might suffice. Larger tears may require a strategic approach, such as blending dyeing methods to hide repairs. Proper assessment ensures you choose the most effective, least noticeable fix. Additionally, understanding the different types of hackathons can inspire creative problem-solving approaches for complex repairs or innovative solutions to extend the life of your tights.

Badge Magic Patch Adhesive – No Sew, No Iron Double-Sided Fabric Tape for Patches & Badges – DIY Solution for Uniforms, Vests, Backpacks – Washer Safe, Made in USA
VERSATILE ADHESIVE SOLUTION: Ideal for DIY crafts, hemming, and patching; washer and dryer safe, this adhesive kit is…
As an affiliate, we earn on qualifying purchases.
As an affiliate, we earn on qualifying purchases.
Gathering Simple Supplies for No-Sew Fixes
To start your no-sew repair, gather a few simple supplies that are easy to find around your home or in your craft stash. You don’t need to visit fabric shopping centers; basic items from your household work just fine. Look for scissors, which are essential for trimming or shaping fabric. You might also want a needle or pins, even if you’re not sewing, to help hold fabric in place temporarily. For sewing alternatives, double-sided tape or fabric glue can be your best friends for quick fixes. Keep in mind, using household items like clear nail polish or hair spray can sometimes help set small tears or frays. Additionally, understanding filter types and their maintenance can help keep your tights in good condition longer, preventing frequent repairs. With these simple supplies, you’re ready to tackle your no-sew tights repair efficiently and effectively.

YONGJIN Double-Sided Fabric Tape (2 Rolls) – No Sewing or Ironing Required, Perfect for Quick Clothing Repairs, Fabric Bonding, Adhesive Cloth Tape for Hemming and DIY Crafts (1/4inch+1/2inch)
【Quantity & Size】 You will get 2 rolls of double sided adhesive fabric tape — 1/4inch x 49…
As an affiliate, we earn on qualifying purchases.
As an affiliate, we earn on qualifying purchases.
Using Fabric Glue for Small Tears and Runs
Choosing the right fabric glue is key to a successful repair, so look for one designed for your fabric type. When applying, be sure to spread the adhesive evenly and avoid excess to prevent messes. For a lasting fix, follow proper drying times and consider reinforcing the area if needed. Using a durable adhesive formulated for textiles can also improve the repair’s longevity.
Choosing the Right Fabric Glue
When repairing small tears and runs, selecting the right fabric glue is essential for a seamless fix. You need to take into account fabric compatibility to ensure the glue bonds well without damaging your tights. Check the label for compatibility with delicate fabrics like nylon or spandex, which are common in tights. Opt for a glue designed for stretchy textiles to maintain flexibility after drying. Additionally, look for adhesives with good adhesive longevity, so the repair lasts through multiple wears and washes. Some glues may be too stiff or brittle over time, causing the tear to reopen. By choosing a high-quality fabric glue suited to your tights’ material, you’ll achieve a durable, discreet fix that extends the life of your favorite pair. Considering the automation of repair processes can also help you find more efficient and effective solutions.
Applying the Adhesive Properly
Before applying the fabric glue, make sure the area around the tear is clean and dry. Gently press the torn edges together, ensuring proper fabric alignment. Use a small brush or applicator to spread a thin layer of glue evenly over the edges, avoiding excess that could seep out. Hold the tear in place for a few seconds to help the adhesive bond. Be careful not to disturb the fabric while the glue sets; proper fabric alignment is key for a seamless repair. Allow the adhesive to dry completely according to the manufacturer’s instructions. During this time, avoid moving or stretching the tights. For the best results, consider using a precision applicator to control the amount of glue applied and prevent overuse. Patience ensures a strong bond and helps prevent future tears, extending the life of your favorite tights.
Tips for Long-lasting Repairs
To guarantee your repair lasts, focus on proper application and some helpful tips. Start by ensuring the fabric is clean and dry to improve adhesion. When applying fabric glue, use a small amount and spread it evenly over the tear or run, pressing gently to secure the edges. For extra durability, consider reinforcing the area with a tiny patch if possible. To maintain your tights’ appearance, avoid harsh fabric care or dyeing techniques that could weaken the glued area. If you want to refresh or customize the color, opt for gentle dyeing methods that won’t compromise the repair. Proper care and precise application help your no-sew fix stay intact longer, extending the life of your favorite tights without sacrificing their look. Paying attention to fabric composition can also influence how well the repair holds over time.

Iron On Patches for Clothes 24pcs, Iron On Patches for Jeans, Cotton Denim Repair Patch for Inside Jeans Fabric Kit, Jeans Knee, Pants, Clothing 3" by 4-1/4" Blue&Black
Premium Material: Our Iron On Patch For Jeans boast remarkable softness, comfort, and resistance to wear. They easily…
As an affiliate, we earn on qualifying purchases.
As an affiliate, we earn on qualifying purchases.
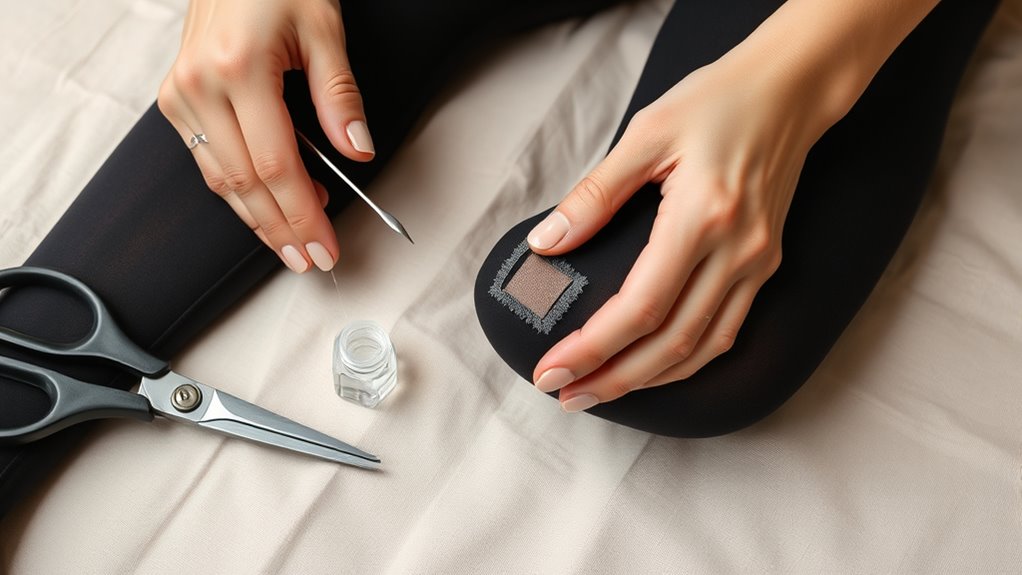
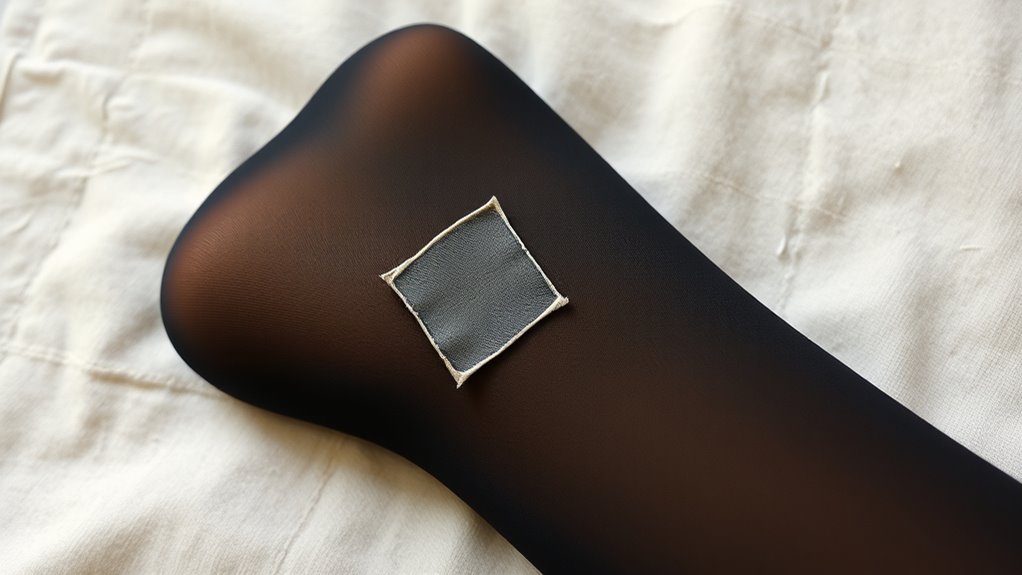
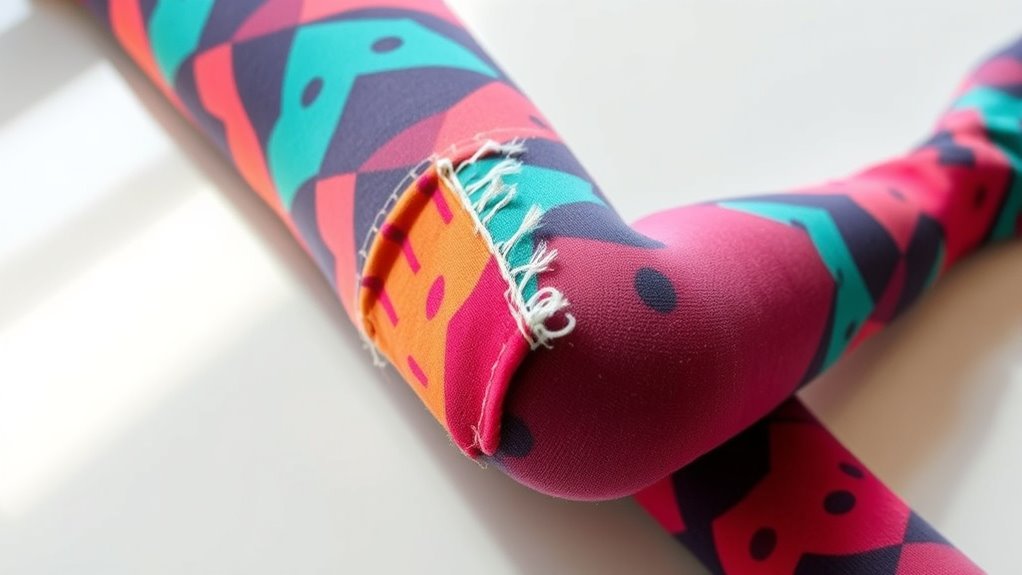
Applying Iron-On Patches for Larger Holes
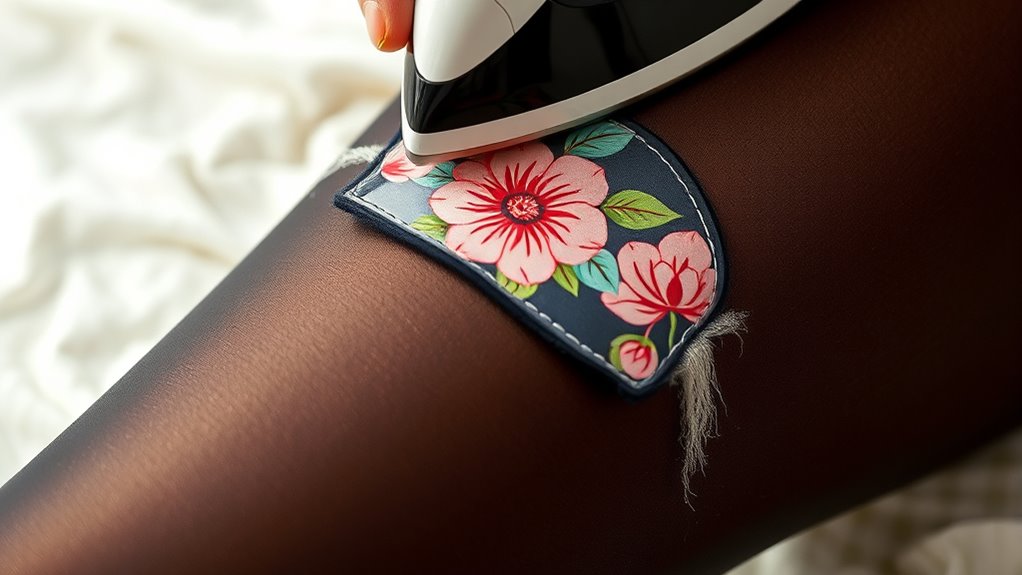
When applying iron-on patches for larger holes, you need to choose the right patch that matches your fabric and size. Make sure to follow proper ironing techniques to guarantee it adheres securely. Additionally, pay attention to securing the edges well to prevent peeling or lifting over time. To ensure a durable bond, controlling the temperature and pressing time carefully is essential, especially when working with thicker fabrics. Proper ironing techniques can greatly improve the longevity of your repair.
Choosing the Right Patch
Choosing the right iron-on patch is essential for effectively repairing larger holes, as not all patches are created equal. Start with fabric selection—select a patch made from a fabric that matches your tights in weight and stretchability for a seamless look. Next, consider color matching; choose a patch that closely resembles the color of your tights or opt for a neutral shade if you plan to dye or decorate later. Inspect the patch’s texture and finish to ensure it will blend well with the fabric. A well-chosen patch will adhere firmly and stretch with your tights, preventing further tears. Taking the time to pick the right fabric and color will make your repair durable and less noticeable, extending the life of your favorite tights effortlessly. Properly angle the patch can also influence how well it integrates with your tights and withstands movement.
Proper Ironing Technique
Before applying the iron-on patch, make sure your tights are clean and completely dry. This guarantees proper adhesion and fabric safety. Set your iron to the manufacturer’s recommended iron temperature for the patch’s fabric type—usually medium heat. Avoid high heat, which can damage delicate tights or cause the patch to melt unevenly. Place a thin cloth or parchment paper over the patch to prevent direct contact with the iron, protecting your tights from heat damage. Press firmly and hold the iron for about 15-20 seconds, applying consistent pressure. Check that the edges are securely adhered before moving on. Proper ironing technique ensures a durable, seamless repair while maintaining fabric safety. Always follow the patch instructions for the best results. Additionally, paying attention to adhesion techniques can help improve the durability of your repair.
Securing Edges Effectively
To guarantee your patch stays securely in place on larger holes, focus on properly sealing the edges. Start by carefully trimming the patch to match the hole’s size, leaving a small margin for edge reinforcement. When applying the iron-on patch, ensure you press firmly around the edges to create a strong seal, preventing fraying or peeling. Use seam sealing techniques by applying extra heat or pressure along the border of the patch. This helps reinforce the edges, making your repair more durable. Make sure the fabric and patch are completely flat before pressing, and hold the iron steadily to avoid gaps. Proper edge reinforcement and seam sealing are key to a clean, long-lasting repair that extends the life of your tights. Additionally, ensuring the patch adheres well can help prevent fabric damage, keeping your tights looking good for longer.
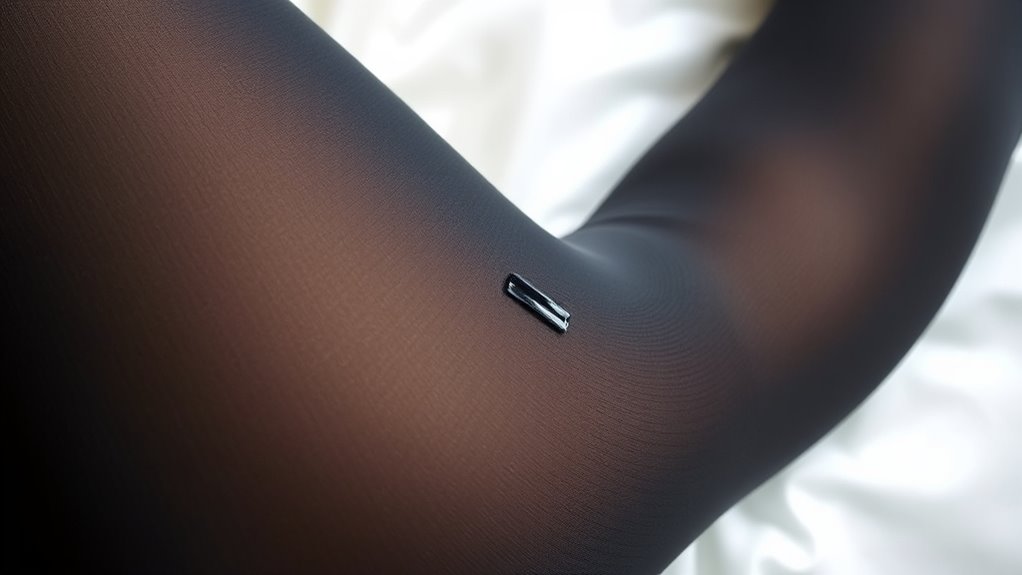
Creating Seamless Repairs With Clear Tape

Have you ever struggled to make a repair blend seamlessly with the rest of your fabric or surface? Clear tape offers an easy solution for a discreet, tape repair that’s almost invisible. To create a seamless mend, follow these tips:
Clear tape provides an almost invisible fix for seamless, discreet repairs on delicate fabrics.
- Cut a piece of clear tape slightly larger than the tear or hole.
- Smooth out air bubbles and wrinkles for a flat, uniform surface.
- Apply the tape from the inside of the fabric to hide it better.
- Press firmly around the edges to secure the tape and prevent peeling.
This method works well for quick fixes, especially on delicate fabrics like tights. With patience and attention, your tape repair can be nearly invisible, extending the life of your favorite garment without extra sewing.
Reinforcing Areas With Decorative or Functional Patches
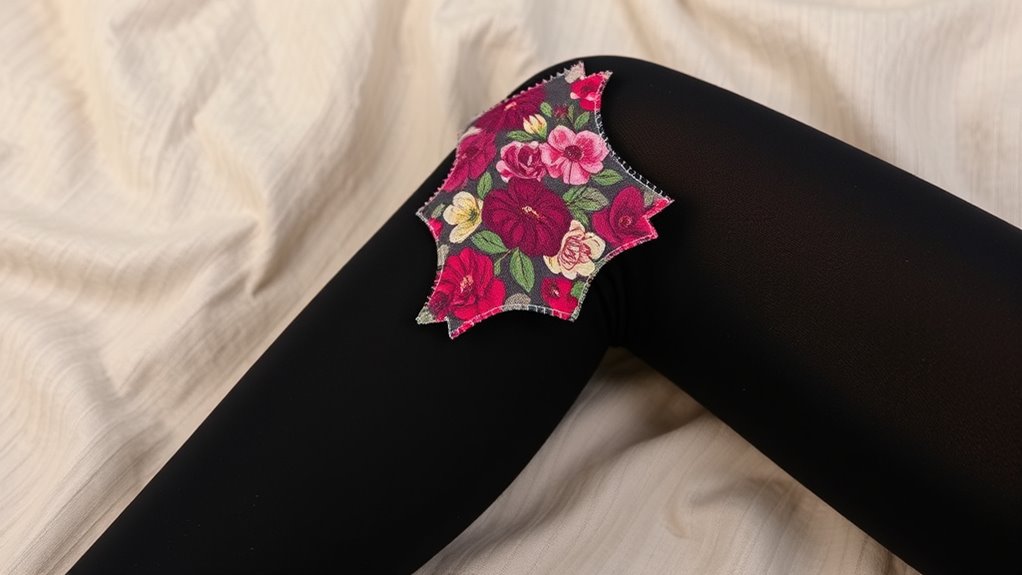
Reinforcing worn or weakened areas with decorative or functional patches is an effective way to extend the life of your fabric items. Decorative patches add a unique style while strengthening the fabric, making them perfect for visible repairs. Functional reinforcement patches provide extra durability in high-stress areas, preventing further tears or damage. You can choose fabrics that match or contrast your tights for a personalized look. Apply these patches with no-sew adhesive or fabric glue, ensuring they lay flat and securely. Position them carefully over the weakened spots, pressing firmly to set. This method not only prolongs the life of your tights but also allows you to customize their appearance. Whether for style or practicality, patches are a simple, effective solution for maintaining your favorite pieces.
Tips for Preventing Further Damage to Your Tights

Are you wondering how to keep your tights looking their best longer? Proper fabric care and wardrobe organization are key. Handle your tights gently when putting them on and taking them off to prevent snags. Store them properly to avoid unnecessary stretching or tearing, such as folding them neatly or using a dedicated drawer. Keep your wardrobe organized so tights don’t get tangled with sharp or rough items that can cause damage. Wash your tights by hand or on a delicate cycle with mild detergent to preserve the fabric’s elasticity. Avoid over-washing, and never tumble dry, as heat weakens fibers. Regularly inspect your tights for signs of wear, and address small issues immediately to prevent bigger tears. These simple tips extend their lifespan and keep them looking fresh.
Best Practices for Maintaining and Storing Tights
To keep your tights in top condition, proper maintenance and smart storage are essential. Start with cleaning techniques that gently wash your tights by hand using mild detergent and cold water to prevent stretching or damage. Avoid wringing or twisting them, as this can weaken the fabric. Once dry, follow storage tips like folding tights carefully instead of hanging them, which can stretch the material. Store them in a drawer or a dedicated container to prevent snags and tangling. Keep your tights away from direct sunlight and sharp objects. Regularly inspecting for tiny tears or runs allows you to address issues early. Applying these best practices helps maintain their elasticity, color, and overall lifespan, ensuring your favorite tights stay in great shape longer.
Creative Ways to Repurpose Old or Damaged Tights
Ever thought about giving your old or damaged tights a new lease on life? You can turn them into stylish DIY crafts and unique accessories with some creativity. These options not only save money but also add a personal touch to your wardrobe. For instance, cut them into colorful headbands or wrist cuffs to add flair to your outfits. You might also repurpose torn tights into decorative flower embellishments for clothing or home decor. Another idea is to create patchwork patches for other garments, blending fashion tips with sustainability. To conclude, use the fabric for small craft projects like fabric flowers or jewelry. These creative ways to repurpose tights are perfect for giving your wardrobe a fresh look while practicing eco-friendly DIY crafts.
Frequently Asked Questions
Can I Fix Runs in Tights Without Sewing or Glue?
Yes, you can fix runs in tights without sewing or glue by using simple knitting techniques or fabric reinforcement. First, turn your tights inside out and gently secure the run with clear nail polish or fabric glue for a quick fix. For a more durable solution, apply fabric reinforcement tape or patch from the inside. This approach keeps your tights intact and extends their wear without sewing skills.
How Do I Choose the Best Repair Method for Different Damages?
To choose the best repair method for different damages, consider the type and location of the tear or run. For small runs, fabric reinforcement with clear nail polish or fabric glue works well, preventing further tear and tear prevention. For larger holes, use patches or adhesive strips to reinforce the area. Always match the repair method to the damage size and fabric type for a durable, discreet fix.
Are There Any Tips for Making Repairs Less Noticeable?
You can make repairs less noticeable by carefully matching the color of your tights and applying the repair discreetly. Use a fine brush or toothpick for precise color matching, blending the repair seamlessly into the existing fabric. Pay close attention to the damage area, and gently work the patch or thread into the surrounding material. When done with patience and care, your fix will blend in, almost like the damage was never there.
What Types of Patches Work Best for Different Fabric Damages?
For fabric damages, choose patch materials that closely match your tights’ color and texture, like sheer or matte patches for a seamless look. Use fabric adhesives to secure patches firmly without sewing, ensuring they stay in place during wear. For small tears, clear patches work best, while larger rips may need thicker or reinforced patches. Always test adhesives first to avoid any color or fabric damage.
How Can I Prevent Future Tears in My Tights Effectively?
Picture your tights like delicate spiderwebs, vulnerable at the edges and stretched thin. To prevent tears, reinforce high-stress areas with fabric reinforcement patches, and always store your tights carefully—folded gently or rolled, avoiding sharp edges or pinching. Keep them away from rough surfaces and excessive stretching. These simple storage tips and reinforcement methods help keep your tights intact longer, so you can enjoy wear after wear without worry.
Conclusion
With these no-sew repair tips, you can extend the life of your favorite tights like a skilled artist restoring a treasured masterpiece. Whether it’s a small tear or a larger hole, a little effort and the right supplies can save you money and keep you stylish. Think of your tights as a delicate fabric garden—tend to them gently, and they’ll continue to brighten your wardrobe for many wears to come.